How to import iPhone photos straight to an external drive on a Mac
The Mac’s own disk is often the smallest one you have, and a few years of iPhone photos can take more room than it has free. You don’t have to copy everything to the Mac first and then drag it across. The built-in apps and Photo Transfer can all put the photos straight onto the drive. What differs is what you find there afterwards.
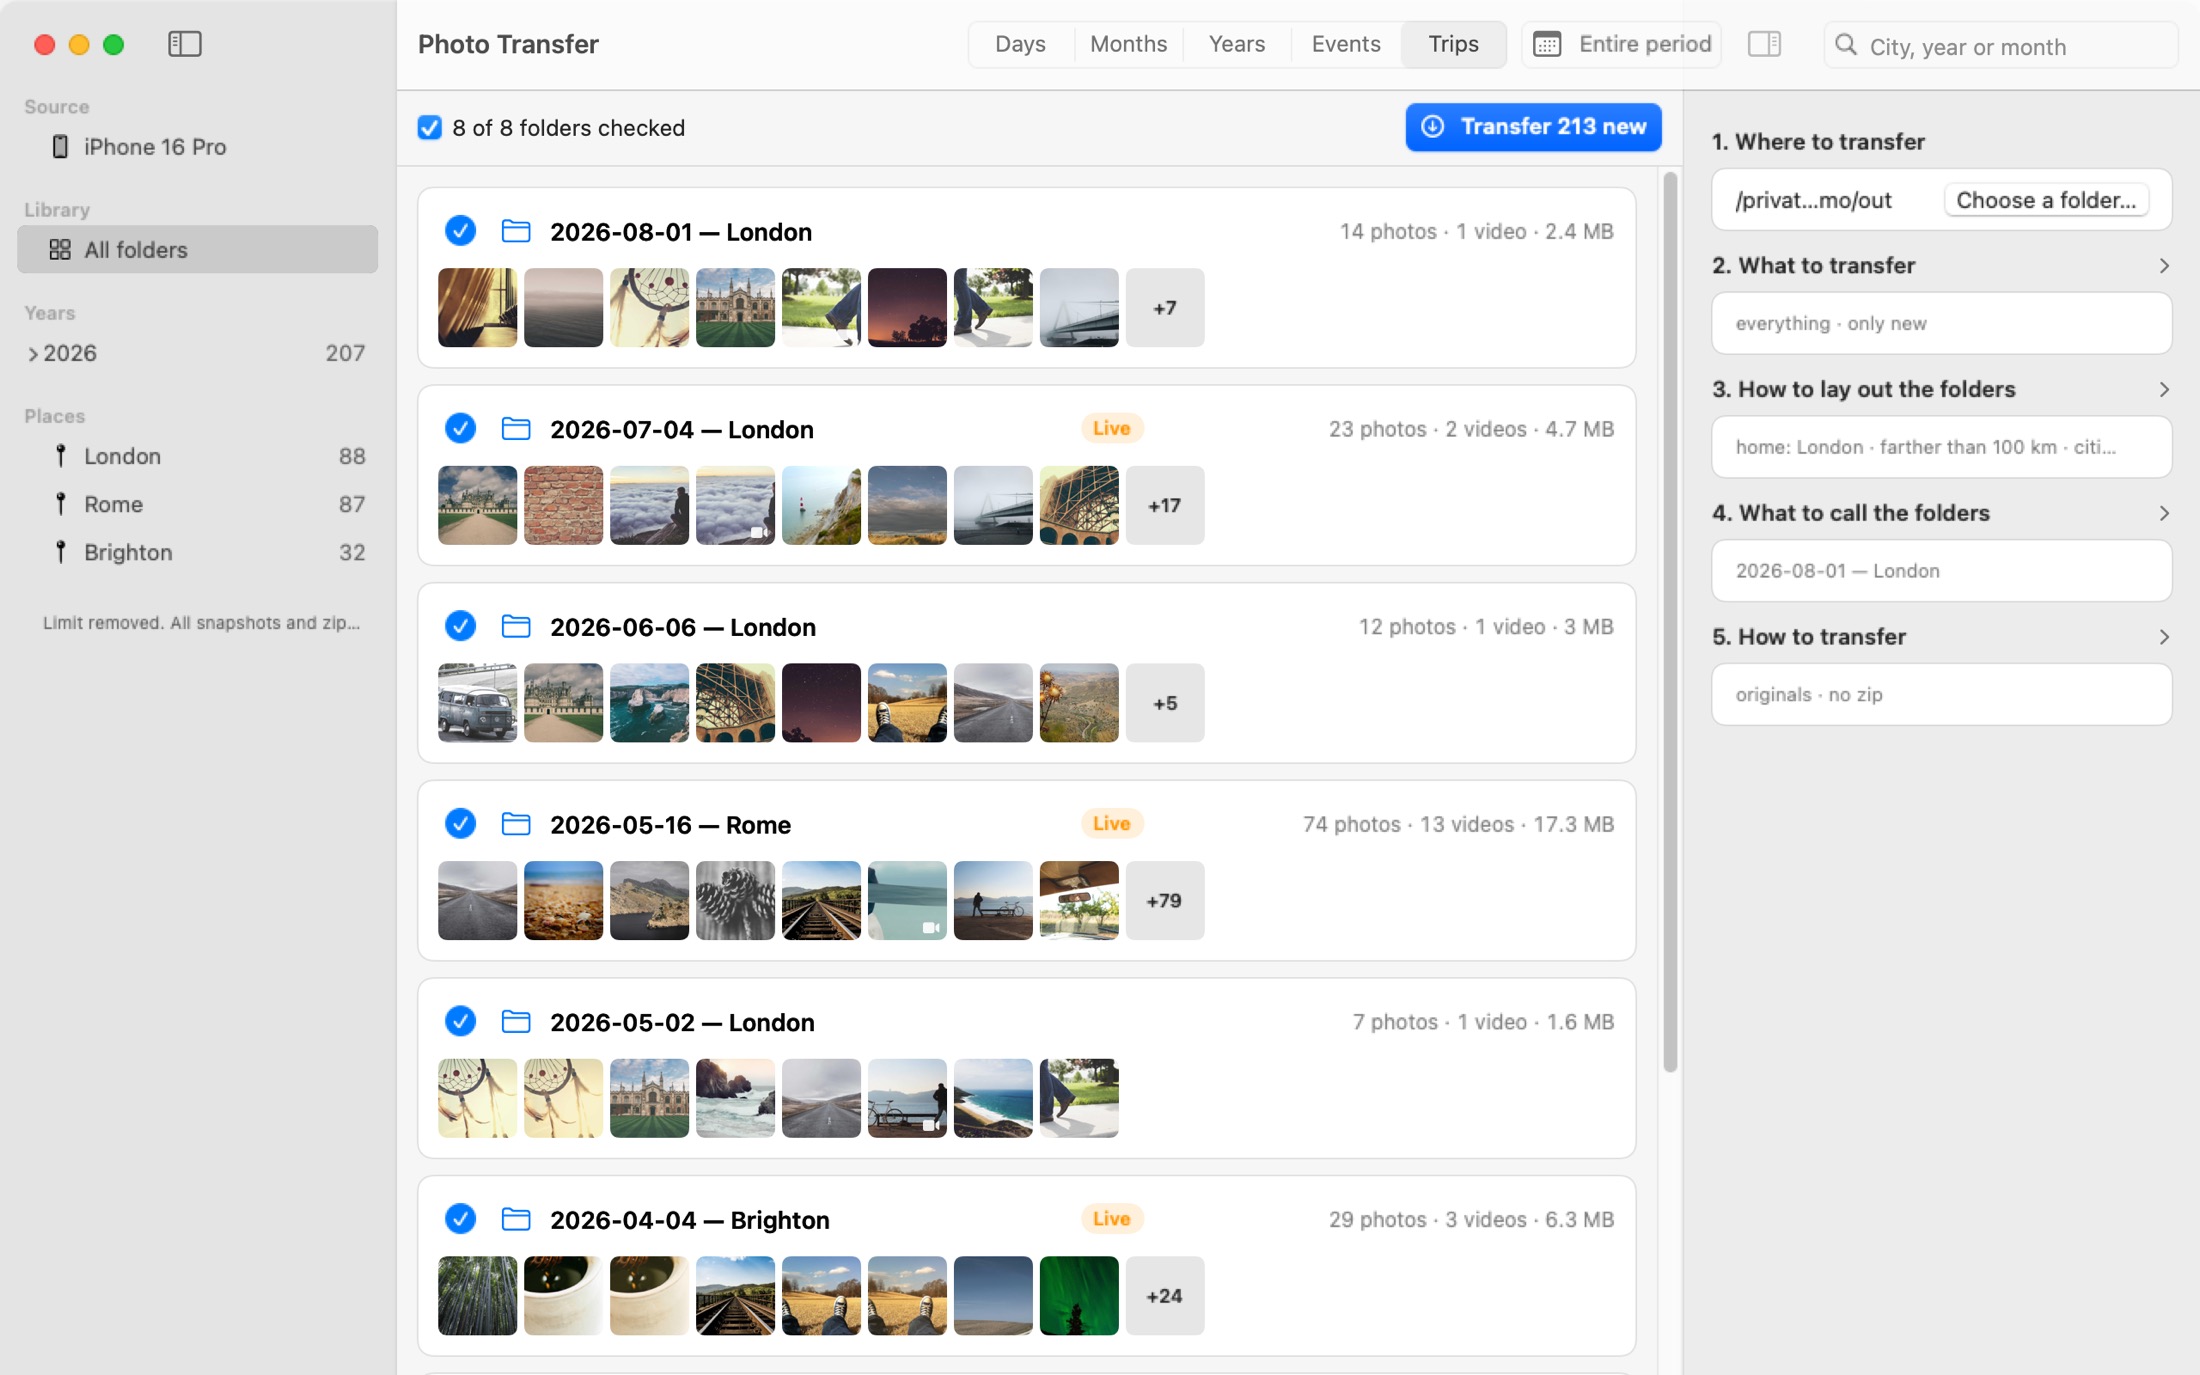
Photo Transfer shows the folders before it copies anything. Pick a folder on the drive and that’s where they’re created.
Before you start
Three things are worth checking before the first copy, and none of them takes long.
The drive’s format. If the drive only ever goes into Macs, APFS is the one to use. It’s the Mac’s own format, and Apple says it works on SSDs and ordinary hard drives alike. If you also plug the drive into a Windows PC, use exFAT, which both can read. Disk Utility shows the format and can change it, but changing it erases the drive, so do that before you put photos on it.
The space. On the iPhone, Settings → General → iPhone Storage shows how much Photos takes. On the Mac, select the drive in Finder and choose File → Get Info to see how much is free. Give yourself some room on top: the drive should hold more than the phone’s photos.
One setting on the iPhone. Over a cable the iPhone may convert HEIC photos and HEVC videos to JPEG and H.264 on the way. For an archive you usually want the files exactly as the phone keeps them. Apple’s way to get that: open Settings, tap Apps, tap Photos, scroll down and tap Keep Originals.
Image Capture: everything into one folder on the drive
Image Capture comes with every Mac and can import straight to the drive.
- Connect the iPhone with a cable and unlock it. If it asks whether to trust this computer, tap Trust.
- Open Image Capture and select the iPhone in the sidebar.
- At the bottom of the window, click the Import To pop-up menu, choose Other, and pick a folder on the drive. A new folder like “iPhone photos” keeps things tidy.
- Click Download All, or select some photos and click Download.
You get every file in that one folder under the phone’s own names, IMG_4021 and so on. A Live Photo arrives as two files, a still and a short video. Sorting by date or trip is up to you afterwards.
Leave Delete after import switched off. It deletes from the phone the moment the import finishes, before you’ve looked at anything. Why that matters is in the storage article.
If Image Capture lists fewer photos than the phone has, here’s why.
Photos: only if the whole library moves to the drive
Photos doesn’t import into a folder you choose. It imports into its library, and by default the library lives in the Pictures folder on the Mac. So Photos will put new photos on the drive only if the whole library moves there first.
Apple’s steps are short. Quit Photos, find Photos Library in your Pictures folder, drag it to the drive, then double-click it there to open it. If you use iCloud Photos, make the moved library your System Photo Library. From then on, Import All New Items puts the photos on the drive.
Apple has conditions for this. The drive has to be APFS or Mac OS Extended (Journaled). It can’t be the Time Machine backup drive, an SD card or a USB flash drive, a network drive, or cloud storage. And the drive has to be connected before you open Photos. If it isn’t, Photos starts a new, empty library on the Mac instead.
The upside is that Photos remembers what it already imported. The downside is that the photos sit inside the library rather than in folders you can open in Finder, and the drive has to be plugged in whenever you open Photos.
Photo Transfer: folders by date or trip, only new photos next time
Photo Transfer, the app I make, writes ordinary files into folders on the drive. Under Where to transfer, click Choose a folder and pick one on the drive.
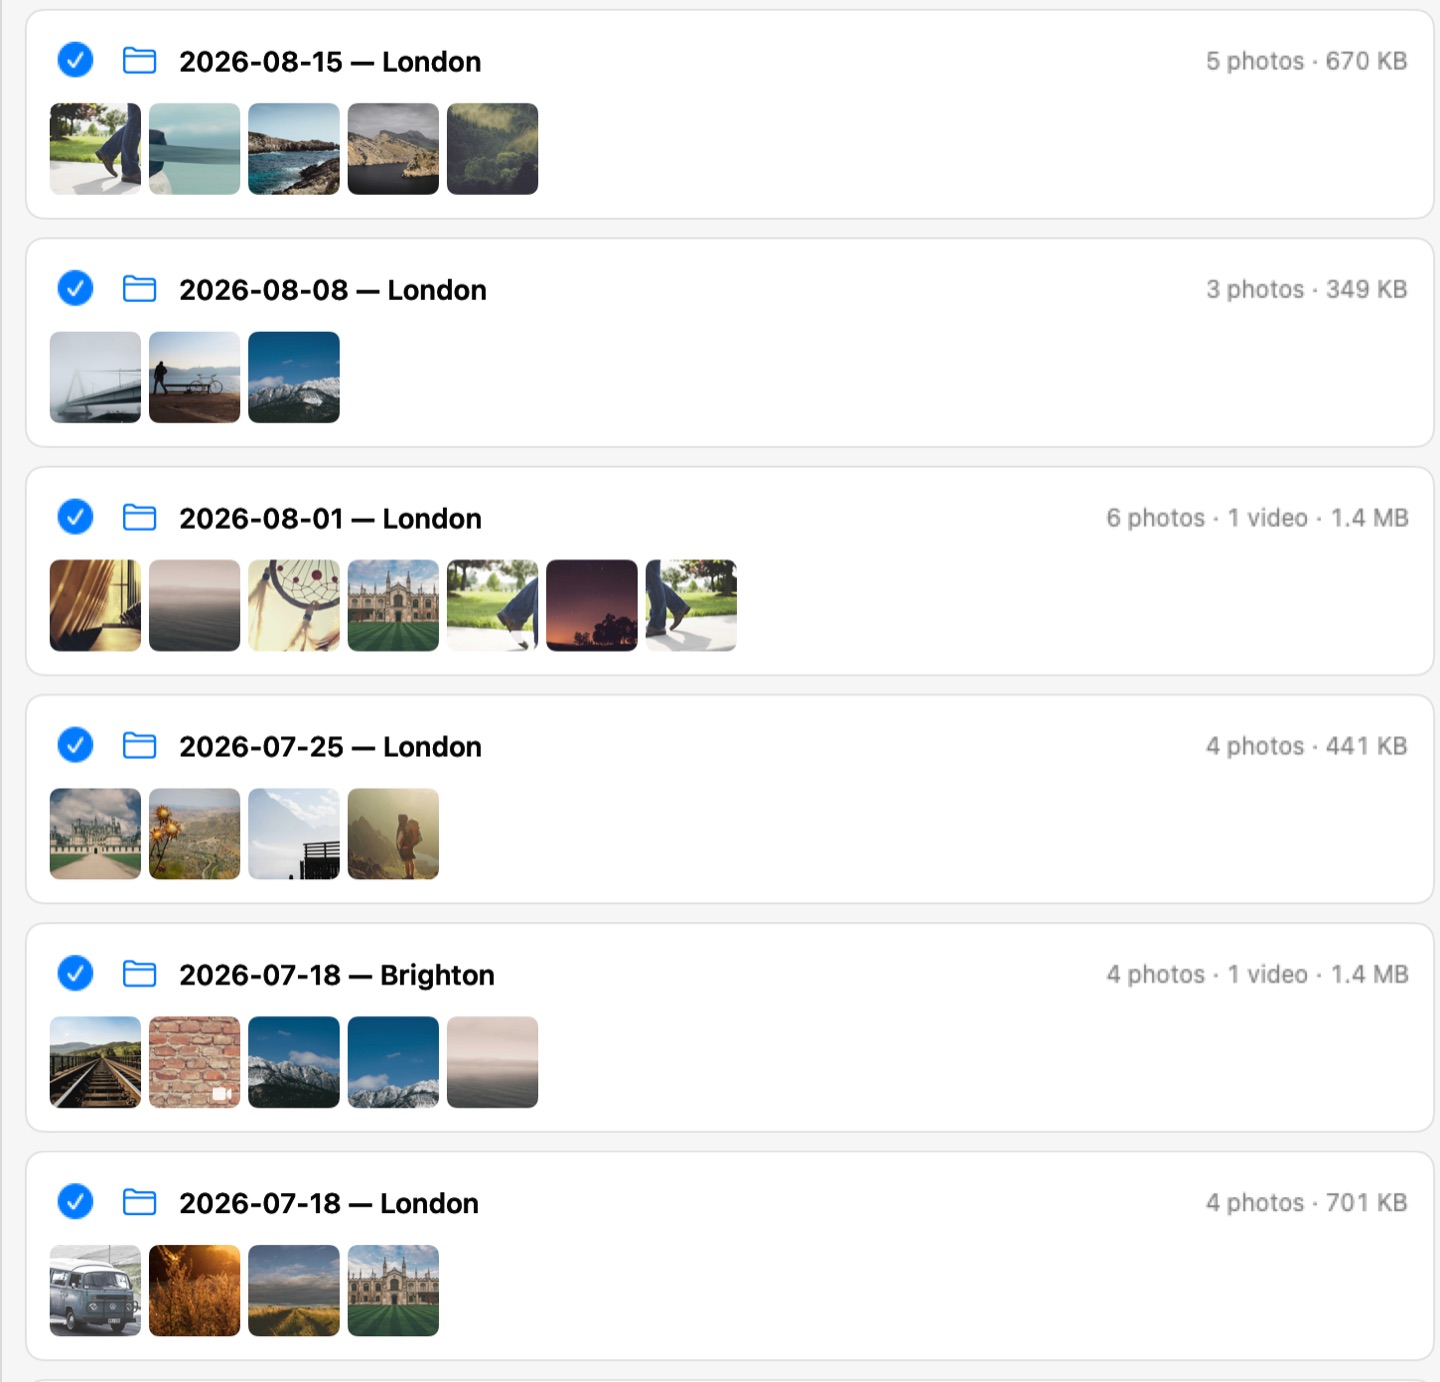
Before anything is copied, you see the folders it’s going to create: by day, month, event or trip. Each Live Photo and edit stays next to its original, and every file is checked as it lands.
Next time, choose the same folder on the drive and it offers only the photos that aren’t there yet. It decides that by looking at the drive itself, so keep the same layout and folder names. If you change them, the photos count as new and get copied again under the new names. A NAS share mounted in Finder works the same way as a drive.
Plug in the iPhone, pick a folder on the drive, and get your photos in folders by date or trip, with only new photos next time. Free for 50 snapshots a day, $14.99 once for everything.
If the drive fills up or comes unplugged
Plugging and unplugging is part of working with a drive, so it’s worth knowing what happens.
In Photo Transfer, if the drive runs out of space halfway, the transfer pauses and tells you how much more room it needs. Free some up and it carries on by itself. If the drive gets unplugged, the transfer stops and says so, and what was already copied stays on the drive. Plug it back in, start again with the same folder, and only what’s missing gets copied. If it’s the iPhone cable that comes out, plug it back in and the transfer continues.
Eject the drive before you unplug it
When the copy is done, eject the drive before you pull the cable. In Finder, click the eject button next to the drive in the sidebar, or select it and choose File → Eject. If the Mac says the drive is in use, some app still has a file open on it. Close that app and try again.
Keep a second copy
If you delete the photos from the phone afterwards, the drive becomes the only place they exist. A drive can fail, get dropped or go missing. Copy the photo folders to a second drive and keep it somewhere else. The storage article has more on deleting from the phone safely.
Checklist
- Drive format: APFS for Macs only, exFAT if it also goes into a Windows PC.
- Enough free space on the drive for everything Photos takes on the phone, plus some.
- On the iPhone: Settings → Apps → Photos → Keep Originals.
- Image Capture: Import To → Other → a folder on the drive. Delete after import off.
- Photos: only by moving the whole library to an APFS or Mac OS Extended drive, and connecting it before you open Photos.
- Photo Transfer: Choose a folder on the drive, and the same folder next time.
- Eject the drive before you unplug it.
- Keep a second copy on another drive.
 Photo Transfer
© 2026 Viacheslav Koniukhov. Sold on this site by Paddle as merchant of record. Apple, iPhone, iPad, Mac, macOS and App Store are trademarks of Apple Inc. Photo Transfer is an independent product, not affiliated with or endorsed by Apple.